


You set up your new iPhone, everything looks fine, and then you add your eSIM line through Settings. Suddenly messages to other iPhone users start bouncing back with a red “Not Delivered” alert, blue bubbles turn green, or your texts arrive from your email address instead of your phone number. This is not a carrier outage and it is not a broken iPhone. Apple has documented this exact problem on iOS 26: when an eSIM is added after the initial setup instead of during it, iMessage never finishes its activation handshake with the new line, so the phone keeps trying to send from an identity that was never registered.
Quick Answer
If iMessage stopped delivering right after you added an eSIM on iOS 26, go to Settings > Apps > Messages and turn iMessage off, then back on. This is Apple’s official fix and it forces iMessage to re-register your phone number. Next, check Settings > Apps > Messages > Send & Receive and confirm your phone number is checked and active. If the number never appears, remove any duplicate inactive SIM lines with the same number under Settings > Cellular, restart the iPhone, and verify the eSIM line is turned on.
Why iMessage Breaks When You Add an eSIM After Setup
Understanding the cause makes every fix below make sense, so here is the short version. iMessage and FaceTime are tied to two identifiers: your Apple ID and your phone number. During the iPhone’s initial setup, iOS registers both at once as part of the same flow. When you skip the eSIM step during setup and add the plan later through Settings > Cellular > Add eSIM, iOS 26 has a bug where it downloads the carrier profile and turns the line on, but never goes back and re-registers the phone number with Apple’s iMessage servers.
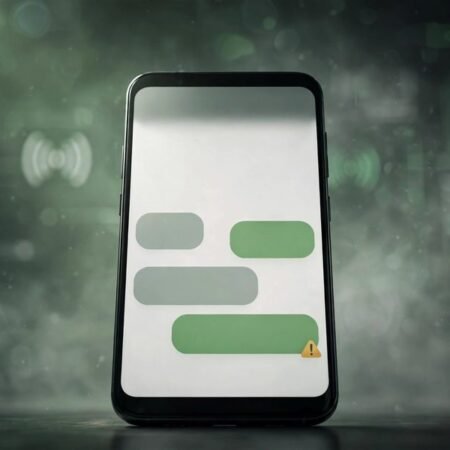
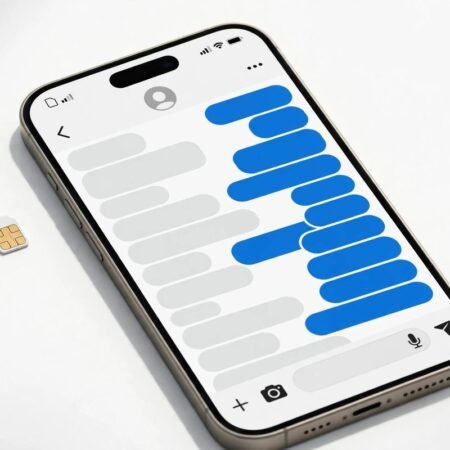
The result is a half-activated state. Apple lists three classic symptoms of it: messages to iPhone users fail with a “Not Delivered” alert, conversations fall back to green SMS or RCS bubbles, and outgoing iMessages are sent from your Apple ID email address because that is the only identifier iMessage knows about. The same bug can also hit you if you switch carriers and set up a brand new eSIM in Settings, because that is again an eSIM added outside the initial setup flow.
There is also a second, related Apple-documented scenario. If you updated to iOS 26 and now have two SIM lines showing the same phone number, one active and one inactive, iMessage cannot decide which line owns the number and refuses to activate it. Fixes 3 and 4 below handle that case specifically.
Fix 1: Toggle iMessage Off and Back On (Apple’s Official Fix)
This is the exact remedy Apple published in its updated support document, and for most people it is the whole solution. Toggling iMessage forces the phone to drop its stale registration and start the activation process from scratch, this time with the eSIM line present and active.
- Open the Settings app.
- Tap Apps, then tap Messages.
- Turn iMessage off.
- Wait about 30 seconds, then turn iMessage back on.
- Give it a minute or two. You should see “Waiting for activation” and then the toggle showing on.
Send a test message to another iPhone user. If it goes through as a blue bubble, you are done. If the toggle flips back off on its own or gets stuck on “Waiting for activation,” move on to Fix 2, because the phone number itself is not registering.
Fix 2: Re-register Your Phone Number Under Send & Receive
Even after the toggle, iMessage sometimes links itself only to your email address and leaves the phone number greyed out. You need to check the Send & Receive panel and make sure the number is selected.
- Go to Settings > Apps > Messages > Send & Receive.
- Under “You can receive iMessages to and reply from,” make sure your phone number is checked, not just your Apple ID email.
- Under “Start new conversations from,” select your phone number so new chats go out with the right caller identity.
- If the phone number is listed but greyed out, tap it and wait. Activation can take a few minutes.
Why this matters: when recipients see your messages coming from an email address instead of your number, this panel is where the wrong identity got locked in. Checking the number here tells iMessage to prefer the eSIM line for new conversations. Note that activating a phone number with iMessage requires the line to send one invisible SMS to Apple’s servers, so your carrier plan needs to allow SMS, even if only domestic, and some carriers charge a small fee for it.
Fix 3: Delete the Duplicate Inactive SIM Line (Same Number Twice)
This is Apple’s second documented fix and it catches the exact scenario where you ported your number to a new eSIM but the old physical SIM or old eSIM profile is still hanging around in the phone.
- Go to Settings > Cellular and look at your SIM lines.
- If you see two lines showing the same phone number, find the one that is no longer active.
- If the inactive one is a physical SIM, take it out of the tray.
- If the inactive one is an eSIM, tap the line, then tap Delete eSIM. (Apple’s newer carrier terminology calls this Erase eSIM; the effect is the same.)
- Go back to Settings > Apps > Messages > Send & Receive and tap the displayed phone number to activate iMessage.
Why it works: iMessage ties one phone number to one active line. With two lines claiming the same number, the activation handshake fails silently and you get the “Not Delivered” loop. Removing the dead duplicate clears the conflict. Do not delete a line you still need for another carrier; this fix is only for a leftover duplicate of the same number.
Fix 4: Turn the eSIM Line On and Set It as Default for Calls
Sometimes the fix is embarrassingly simple: the eSIM profile downloaded fine, but the line itself is switched off or was never made the default voice line, so iMessage has no live number to register against.
- Go to Settings > Cellular > [your eSIM line] (it will show the carrier name).
- Make sure Turn On This Line is enabled.
- While here, set it as the Default Voice Line if this is the number you want iMessage to use.
- Also confirm the line shows bars or a signal indicator at the top of the screen.
If the line will not turn on at all or shows “No Service,” the problem is the eSIM profile itself, not iMessage. In that case start with our guide on eSIM activation failures before coming back to these iMessage steps, because iMessage cannot register against a line that has no service.
Fix 5: Sign Out and Back Into Your Apple ID for Messages
iMessage activation is a three-way handshake between your phone, your carrier, and Apple’s servers, and it is keyed to your Apple ID. A stale or half-signed Apple ID session can block the number registration even when everything else is right.
- Go to Settings > Apps > Messages > Send & Receive.
- Tap your Apple ID and choose Sign Out.
- Go back to Settings > Apps > Messages and turn iMessage off, then back on.
- Sign in with your Apple ID when prompted, and re-check your phone number in Send & Receive.
This forces a fresh authentication with Apple’s activation servers. It is especially useful if you recently changed your Apple ID password or migrated to a new device with iCloud restore, because old activation tokens sometimes linger on the restored phone.
Fix 6: Update to the Latest iOS Version
The eSIM-after-setup bug is specifically an iOS 26 issue, and Apple has been refining the activation flow with point updates. Running an early iOS 26 build leaves you exposed to bugs that later versions fixed.
- Go to Settings > General > Software Update.
- If an update is available, install it on Wi-Fi with the phone charged or plugged in.
- After updating, repeat Fix 1 (toggle iMessage off and on) once more, since activation sometimes needs a fresh kick after a system update.
This is worth doing even if your symptoms appeared after a carrier switch rather than a fresh setup. Carrier settings updates arrive bundled with these system updates, and outdated carrier settings are a known cause of number verification failures.
Fix 7: Reset Network Settings (Last Resort Before Apple Support)
If every check above looks correct and the number still will not activate, your network configuration may hold stale entries from the old SIM or the interrupted setup. A network settings reset clears saved Wi-Fi networks, cellular settings, and VPN configurations and rebuilds them cleanly.
- Go to Settings > General > Transfer or Reset iPhone > Reset.
- Tap Reset Network Settings and confirm with your passcode.
- The phone restarts. Rejoin your Wi-Fi network, then go to Settings > Apps > Messages and toggle iMessage off and on again.
You will not lose photos, apps, or messages, but you will need to re-enter Wi-Fi passwords. After the reset, give iMessage up to 24 hours; Apple says activation can occasionally take that long, and most genuine server-side delays resolve within a day. If the number is still not active after 24 hours with good signal and an updated iOS, contact your carrier to confirm the line supports SMS activation and that the number port completed, then contact Apple Support if the carrier side is clean.
What Each Status Message Means
Not every messaging problem after an eSIM change is the iMessage bug. Use this table to match what you see on screen to the right fix.
tr>
| What you see | What it means | Start with |
|---|---|---|
| Red “Not Delivered” under blue bubbles | iMessage never registered the new number | Fix 1, then Fix 2 |
| Green SMS or RCS bubbles with iPhone users | iMessage is off or not activated at all | Fix 1, then Fix 4 |
| Messages arrive from your email address | Number not checked in Send & Receive | Fix 2 |
| “Waiting for activation” for hours | Number registration stalling | Fix 4, then Fix 6, then Fix 7 |
| “iMessage activation could not sign in” | Apple ID handshake problem | Fix 5 |
| No signal or “No Service” on the eSIM line | eSIM profile problem, not an iMessage problem | Fix 4, then our eSIM activation guide |
Frequently Asked Questions
Why did iMessage stop working right after I added my eSIM?
Because on iOS 26, adding an eSIM after the initial iPhone setup does not trigger automatic iMessage activation. The carrier line goes live, but iMessage never re-registers your phone number, so sends fail or fall back to SMS. Toggling iMessage off and on in Settings > Apps > Messages is Apple’s documented fix.
Do I need to delete my eSIM to fix iMessage?
No, not in the common case. Only delete an eSIM line if it is a duplicate: an inactive leftover showing the same phone number as your active line. Deleting your only active eSIM would remove your cellular plan and make things worse, and you would need a new QR code or carrier app setup to get it back.
Will my carrier charge me for iMessage activation?
Possibly a tiny amount. Registering your phone number with iMessage sends one invisible international SMS to Apple’s servers, and some carriers bill for it or require SMS to be enabled on the plan. If you are on a plan with no SMS at all, that alone can block activation.
Why are my iMessages sending from my email address?
Because your phone number never activated with iMessage, so the service fell back to the only identifier it had: your Apple ID email. Go to Settings > Apps > Messages > Send & Receive and check your phone number under both “receive” and “start new conversations from” after running the toggle fix.
Does this bug affect FaceTime too?
Yes. FaceTime uses the same phone number registration mechanism as iMessage. If your number will not activate for iMessage, FaceTime calls from your number will usually fail the same way. Fixing iMessage with the steps above normally fixes FaceTime as well, since both register in one activation pass.
I switched carriers and got a new eSIM. Do these fixes apply?
They do. Apple notes the bug also affects people who switch carriers and set up the new eSIM through Settings afterward, because that is the same “eSIM added outside initial setup” pattern. Work through Fixes 1 through 4 in order before trying the deeper resets.
Conclusion
The “Not Delivered” bug after adding an eSIM on iOS 26 looks alarming but has a clear cause: iMessage never re-registered your phone number when the new line was added. Apple’s official remedy, toggling iMessage off and back on under Settings > Apps > Messages, resolves it for most users in under a minute. When it does not, the remaining fixes walk down the same chain of failure points Apple documents, from the Send & Receive number selection, to duplicate inactive lines, to the Apple ID handshake, and finally to network settings and carrier activation. Work through them in order, test with a blue bubble after each one, and stop at the step that fixes it.